Staining your hardwood floors is a great way to breathe new life into them, adding warmth, character, and elegance to any room. However, achieving a beautiful and even finish can be challenging, especially if you are doing it yourself. Professional staining services are available, but if you choose to do it yourself, here are some steps to follow:
Step 1: Prepare Your Floors
Before staining your floors, it is important to prepare them properly. Start by removing any furniture, rugs, or debris from the room. Then, clean your floors thoroughly using a broom or vacuum to remove any dirt, dust, or debris. You may also need to use a wood cleaner or solvent to remove any stubborn stains or marks.
Step 2: Sand Your Floors
Sanding your floors is an essential step in achieving a smooth and even finish. Use a drum or belt sander to remove the top layer of wood and any scratches, stains, or imperfections. Start with a coarse grit sandpaper and gradually work your way up to a finer grit. Be sure to sand in the direction of the grain to avoid damaging the wood.
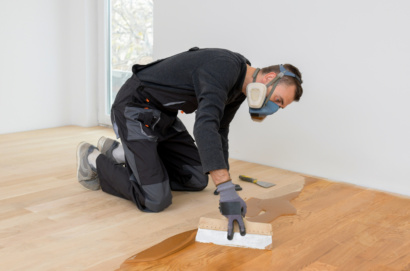
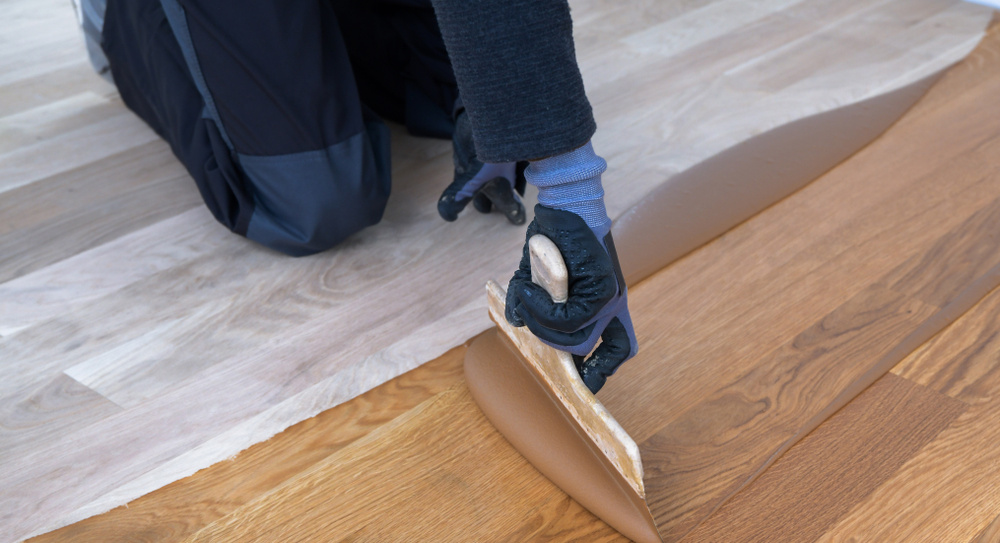
Step 3: Stain Your Floors
Once your floors are sanded and smooth, it’s time to apply the stain. Choose a stain that complements the color and style of your home. Always test the stain on a small, inconspicuous area first to ensure that you like the color and that it is compatible with your wood. Apply the stain using a brush, roller, or sprayer, following the manufacturer’s instructions.
Step 4: Wipe Off the Excess Stain
After applying the stain, use a clean cloth to wipe off any excess. Be sure to work in small sections and wipe off the excess before it dries. This will help to prevent streaks, blotches, or uneven coloring.
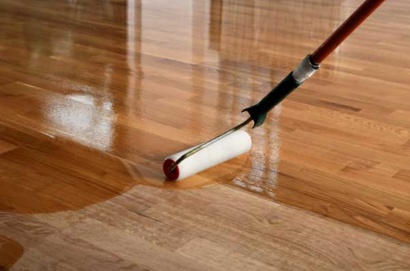
Step 5: Apply the Finish
Once the stain has dried completely, it’s time to apply the finish. Choose a finish that is appropriate for your hardwood floors, such as polyurethane, oil-based, or water-based. Apply the finish using a brush, roller, or sprayer, following the manufacturer’s instructions. Be sure to work in small sections and apply the finish evenly and smoothly.
Step 6: Allow the Finish to Dry
After applying the finish, allow it to dry completely before walking on your floors or replacing any furniture. This can take anywhere from a few hours to a few days, depending on the type of finish and the humidity level in your home. Be sure to follow the manufacturer’s instructions for drying time and curing time.
Hire a Professional Flooring Company for a Flawless Finish
In conclusion, staining your hardwood floors can be a rewarding and satisfying project that adds value and beauty to your home. However, it requires careful planning, preparation, and execution to achieve a beautiful and even finish. If you are unsure about doing it yourself, consider hiring a professional staining service to ensure that your floors are stained properly and that the finish will last for years to come. FloorU is a professional flooring company in Virginia with over three decades of experience sanding and refinishing hardwood floors. Let our expert team bring life back to your wood floors today; request a free flooring estimate to get started!